New .NET and new Blazor features. In this blog post, I want to highlight the new features that are hitting us with .NET 8 in the Blazor world. So let's see what's new.
Serverside rendering
Let's see the most important change first: The unification of Blazor Server and Blazor WebAssembly into one template: Blazor Web. Yes, that is it. Microsoft wants to have one template to fit all your needs! That means you can define per component what you need. So, with the new template, you can still emulate the "old" world and set everything to Server or WebAssembly. But let's see how this plays out with code. For this, let's explore the updated template.
An advertisement on my behalf: I am offering .NET 8 and Blazor Workshops as well as consultancy and development. If you are interested, head over to https://giesel.engineering.
The application
We are greeted with a very slim Program.cs:
// Add services to the container.
builder.Services.AddRazorComponents()
    .AddServerComponents();

var app = builder.Build();

// Configure the HTTP request pipeline.
if (!app.Environment.IsDevelopment())
{
    app.UseExceptionHandler("/Error");
    // The default HSTS value is 30 days. You may want to change this for production scenarios, see https://aka.ms/aspnetcore-hsts.
    app.UseHsts();
}

app.UseHttpsRedirection();

app.UseStaticFiles();

app.MapRazorComponents<App>()
    .AddServerComponents();

app.Run();
The most important aspects: AddServerComponents - this will allow to use server-side rendering. But wait a minute, before we go further, what do I mean with server-side rendering?
Well let's discuss the two hosting models that are already present in Blazor:
- Client/WebAssembly: Here we push the .NET code as WebAssembly code to the browser and execute the code inside the user's browser. All DOM actions and rendering is done inside the browser. The server is only used to serve the static files and the WebAssembly code.
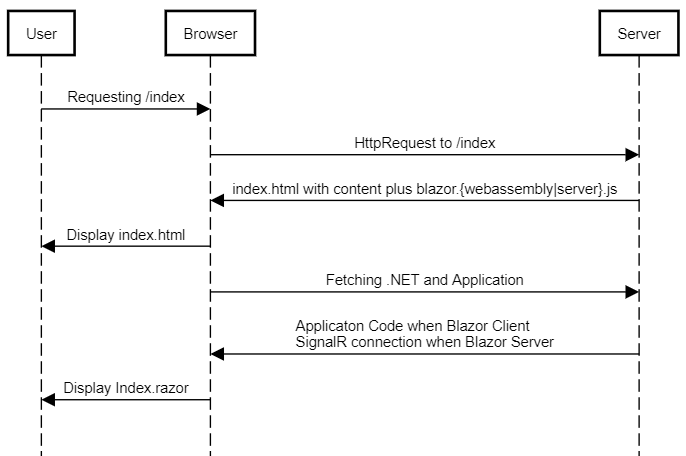
- Server: Here the code is solely handled by the ASP.NET Core Server. The server establishes a SignalR connection to the client and sends the DOM changes to the client. The client only renders the DOM changes and sends back the user interactions to the server. So, every click results in a roundtrip to the server.
Now meet server-side rendering: This is kind of a special case of the server hosting model. Here, the server renders the whole DOM and sends it to the client. The client only renders the DOM. That is it. No SignalR, just static content. That is amazing for read-only content with zero interactions, but obviously falls short if you need to handle button clicks. Therefore you can define per component what you need. So you can have a mix of server-side rendering and client-side rendering. Well, or just static content. You might ask yourself, okay how does that work in practice? The default is static - therefore, every component is rendered on the server and the DOM is sent to the client - end of story. You have to change on a component or page level what you want. As many things, if you define what you want, for example, client-side rendering, then every subcomponent will also have server-side interactivity (of not overriden). You can set the rendering mode via the RenderMode attribute. So let's see what that looks like in code:
@page "/counter"
@attribute [RenderModeServer]

<PageTitle>Counter</PageTitle>

<h1>Counter</h1>

<p role="status">Current count: @currentCount</p>

<button class="btn btn-primary" @onclick="IncrementCount">Click me</button>

@code {
    private int currentCount = 0;

    private void IncrementCount()
    {
        currentCount++;
    }
}
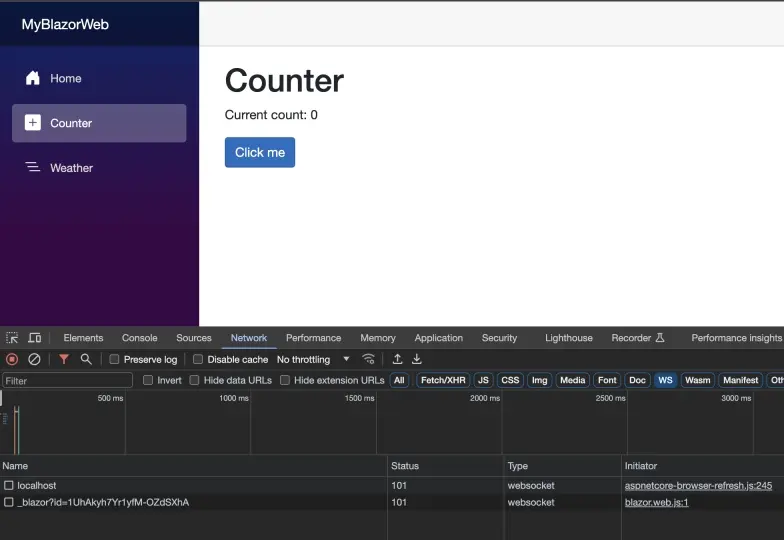
We can see that the Counter example uses RenderModeServerAttribute. To demonstrate the easiest way it works, just comment out or delete the @attribute [RenderModeServer] part, recompile your code, and try to click the button. You will see that literally nothing will happen. And there is a simple reason - the page is static. So, revert the change and add the attribute again. But this time, before you go onto the page, open your network tab of your developer tools:

We can see that when we navigate onto our Counter page, a new WebSocket connection is established! That is how we can achieve the interactivity on our page.

There is also another RenderMode so-called RenderModeAuto: Here is the explanation from the official docs:
The Auto render mode determines how to render the component at runtime. The component is initially rendered server-side with interactivity using the Blazor Server hosting model. The .NET runtime and app bundle are downloaded to the client in the background and cached so that they can be used on future visits. Components using the Auto render mode must be built from a separate client project that sets up the Blazor WebAssembly host.
If you used Blazor Server, you know that you can prerender webpages. So, the server renders the page, sends it to the client, and then establishes the SignalR connection. This is the default. If you want to opt out of this, you have to explicitly specify it: @attribute [RenderModeServer(prerender: false)].
Another very important aspect: You can't switch between interactive render modes. So, a WebAssembly component can't contain a Server subcomponent.
There is also a nice and easy way to change the default of your whole application (for example, because you need interactivity from the get-go). Let's have a look at App.razor:
<body>
 <Routes/>
 <script src="_framework/blazor.web.js"></script>
</body>
We can change the rendermode via an attribute on the Routes object to enable, for example Blazor Server:
<body>
 <Routes @rendermode="@RenderMode.Server"/>
 <script src="_framework/blazor.web.js"></script>
</body>
The same applies to your components and pages. The @rendermode is the way to switch between the different render modes on a component base, whereas @attribute [RenderModeXXX] is on a page level.
Streaming Rendering
The easiest way to see Streaming Rendering in effect is to go to the Weather.razor. We can see that on the top @attribute [StreamRendering(true)] is set.
Just remove this line for the time being and go to the Weather page inside the browser. You will never see the Loading... part. Remember, this is a statically rendered page and not a Blazor server interactivity-enabled one. Bring back the attribute and reload the page - you can see that the Loading... part is shown. You can extend the code to make that way more visible:
private List<WeatherForecast>? forecasts;
protected override async Task OnInitializedAsync()
{
// Simulate asynchronous loading to demonstrate streaming rendering
await Task.Delay(500);
var startDate = DateOnly.FromDateTime(DateTime.Now);
var summaries = new[] { "Freezing", "Bracing", "Chilly", "Cool", "Mild", "Warm", "Balmy", "Hot", "Sweltering", "Scorching" };
forecasts = Enumerable.Range(1, 5).Select(index => new WeatherForecast
{
Date = startDate.AddDays(index),
TemperatureC = Random.Shared.Next(-20, 55),
Summary = summaries[Random.Shared.Next(summaries.Length)]
}).ToList();
StateHasChanged();
// Simulate asynchronous loading to demonstrate streaming rendering
await Task.Delay(1000);
forecasts.AddRange(Enumerable.Range(1, 5).Select(index => new WeatherForecast
{
Date = startDate.AddDays(index),
TemperatureC = Random.Shared.Next(-20, 55),
Summary = summaries[Random.Shared.Next(summaries.Length)]
}));
}
I changed the service so that it is a list and also that we have multiple points inside the OnInitializedAsync method where we simulate loading and adding stuff. If you open the page, you can see that three times the page gets updated with new information!
Conclusion
That was a very brief overview of the new features in Blazor and .NET 8. Obviously, there is so much more, I just covered a tiny bit! Anyway, I do like the direction where Blazor is heading and I am looking forward to the future!


