Why having end to end tests
As described in Part 1 we need end to end tests for various reasons:
- We want to check if every real (in the sense of not a mocked one) component and service is working together
- That means our database, application layer, UI layer in one. Maybe even external services (which could make the tests less stable as you are now dependent on the availability of this service)
When to use it
That part seems very debatable. Depending on the source you read you will find anything from almost nothing to just test everything. So the next part is just personal preference, please take it with a grain of salt.
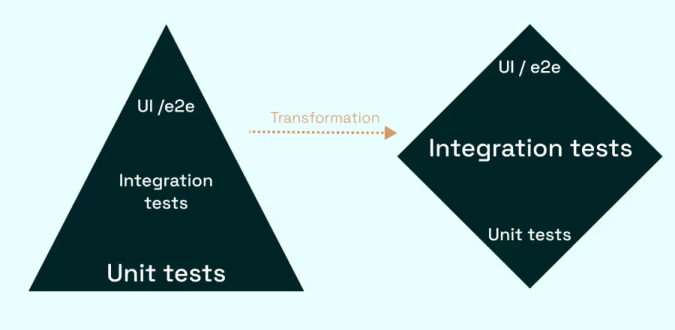
Let's have a look at the testing pyramid:
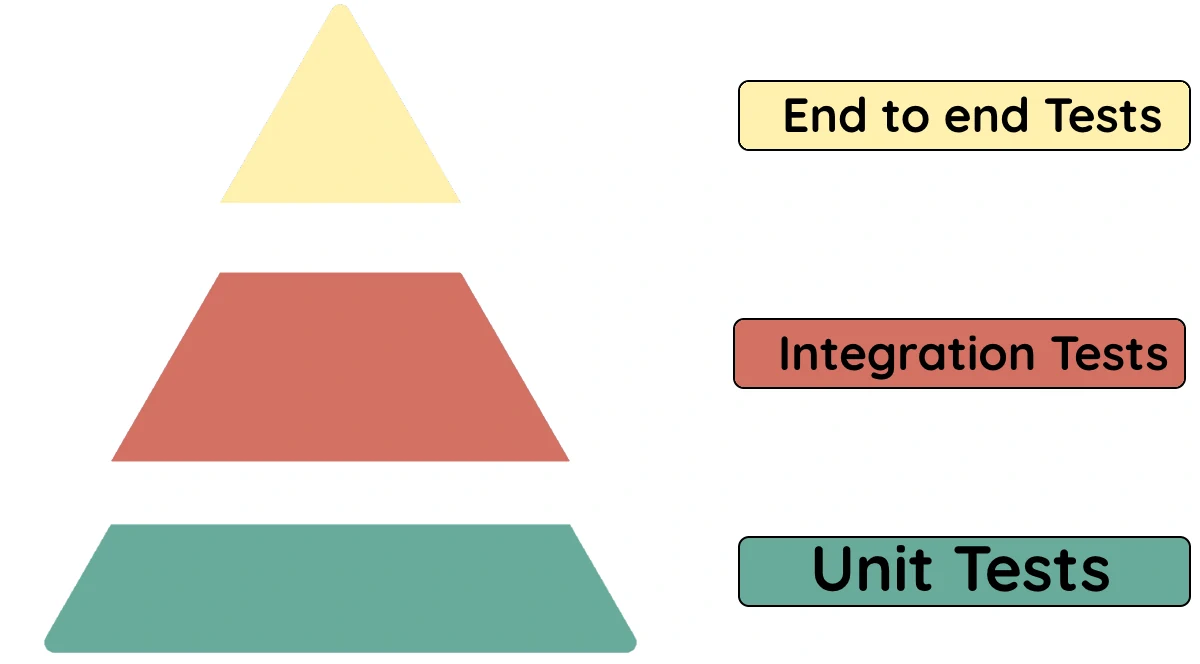
As we can see Unit tests are building your foundation. There are cheap to write and execute. Therefore they give you valuable and fast feedback. They should cover the base of your application.
Integration tests, as the name suggest, integrate multiple components in one system but they don't cross system boundaries. For example you have one component fetching data from your database in a form of a stored procedure and passing those afterwards to the UI. This behavior can't be mocked away. You want to test the stored procedure and that the data is passed correctly in your system.
E2E tests can cross system boundaries. Let's assume you have a login page which is using an identity server. The server is not directly part of your system, but it is a mandatory step. Therefore you can check the login procedure and they you land on the correct landing page in an E2E test.
My recommendation is the following:
- Try to test as much as possible with unit and integration tests
- Use E2E tests sparely.
- Do not test exceptional cases. They can most likely be tested with unit or integration tests
- Smoke tests are a good approach for E2E tests
Playwright
Here the official introduction from the github page of playwright: Playwright for .NET is the official language port of Playwright, the library to automate Chromium, Firefox and WebKit with a single API. Playwright is built to enable cross-browser web automation that is ever-green, capable, reliable and fast.
Let's go!
We will take our example from Part 1 and try to e2e test the counter behavior.
Install the tools for Playwright
The first step is to install all tools so that we can run our test. Either head over to Playwright and follow the steps or do the following:
- Run
dotnet tool install --global Microsoft.Playwright.CLIfrom a shell - Run
playwright install(depending on your shell you have to restart your shell as the command is not recognized)
Create a new Unit Test Project
We create a new unit test project and add the Playwright package:
PM > Install-Package PlaywrightSharp -Version 0.192.0
This time we do not need the reference to our productive assembly. This because we are solely relying on the structure of the document.
Now to the test:
using System.Threading.Tasks;
using Microsoft.Playwright;
using Xunit;

namespace BlazorTests.E2ETests
{
    public class IndexTitleTests
    {
        [Fact]
        public async Task ShouldIncreaseCounterByOne()
        {
            // Arrange
            using var playwright = await Playwright.CreateAsync();
            var browser = await playwright.Chromium.LaunchAsync(new BrowserTypeLaunchOptions
            {
                Headless = true,
            });
            var page = await browser.NewPageAsync();
            await page.GotoAsync("https://localhost:5001/counter");
            await page.ScreenshotAsync(new PageScreenshotOptions {Path = "before_click.png"});

            // Act
            await page.ClickAsync(":text('Click me')", new PageClickOptions
            {
                ClickCount = 2,
            });

            // Assert
            await page.ScreenshotAsync(new PageScreenshotOptions {Path = "after_click.png"});
            var counter = await page.QuerySelectorAsync("p");
            var content = await counter.InnerTextAsync();
            Assert.Equal("Current count: 2", content);
        }
    }
}
Before we go into detail what really happens, just run this test and look what happens. Most likely you will receive the following error:
BlazorTests.E2ETests.IndexTitleTests.ShouldIncreaseCounterByOne

Microsoft.Playwright.PlaywrightException: net::ERR_CONNECTION_REFUSED at https://localhost:5001/counter
In contrast to our Unit Tests were we had a reference to the component itself, here we can not rely on that. Therefore we need a real running server with our website. If you just run your project you should be good to go and the test should turn green. If you are running with IIS Express you have to adapt the port in page.GotoAsync(...).
Now let's decompose the test and look what it does.
using var playwright = await Playwright.CreateAsync();
var browser = await playwright.Chromium.LaunchAsync(new BrowserTypeLaunchOptions
{
    Headless = true,
});
The main goal is to create a real browser. In my case I used Chromium but you can also use Firefox or Webkit. This enables you to test your website with different browser.
Also there is an Headless option which is set to true (this is the default). If Headless is false Playwright will open a real browser window and click through your application. That is very helpful in case of red tests or exceptions.
You also have the SlowMo property. This gives the timespan in milliseconds between each action. I would propose if you try the headful approach and want to check what playwright is doing set it something like 2000 (2 seconds).
var page = await browser.NewPageAsync();
await page.GotoAsync("https://localhost:5001/counter");
await page.ScreenshotAsync(new PageScreenshotOptions {Path = "before_click.png"});
We now create a new page and navigate to it. We do not have to take care of when the site is finished loading. That is why we use playwright. It does it for us.
The ScreenshotAsync is a nice function if you want to see what the browser would see in that moment. You can also use it to keep your documentation pictures up to date.
The act part:
await page.ClickAsync(":text('Click me')", new PageClickOptions
{
    ClickCount = 2,
});
Playwright works in the same way bUnit does. We use Css-Selectors to get to our elements and interact with them. In my example I choose to look for an HTML-element with has "Click me" as text. Once found playwright should click twice on it.
await page.ScreenshotAsync(new PageScreenshotOptions {Path = "after_click.png"});
var counter = await page.QuerySelectorAsync("p");
var content = await counter.InnerTextAsync();
Assert.Equal("Current count: 2", content);
And again we use query selector to get the p element (it is the only in the page) and check how the content is after the two clicks. Also here we do not have to implement anything to know when the click is done, playwright does it for us. I also took another screenshot after the click. Both screenshots look like this:
| before | after |
|---|---|
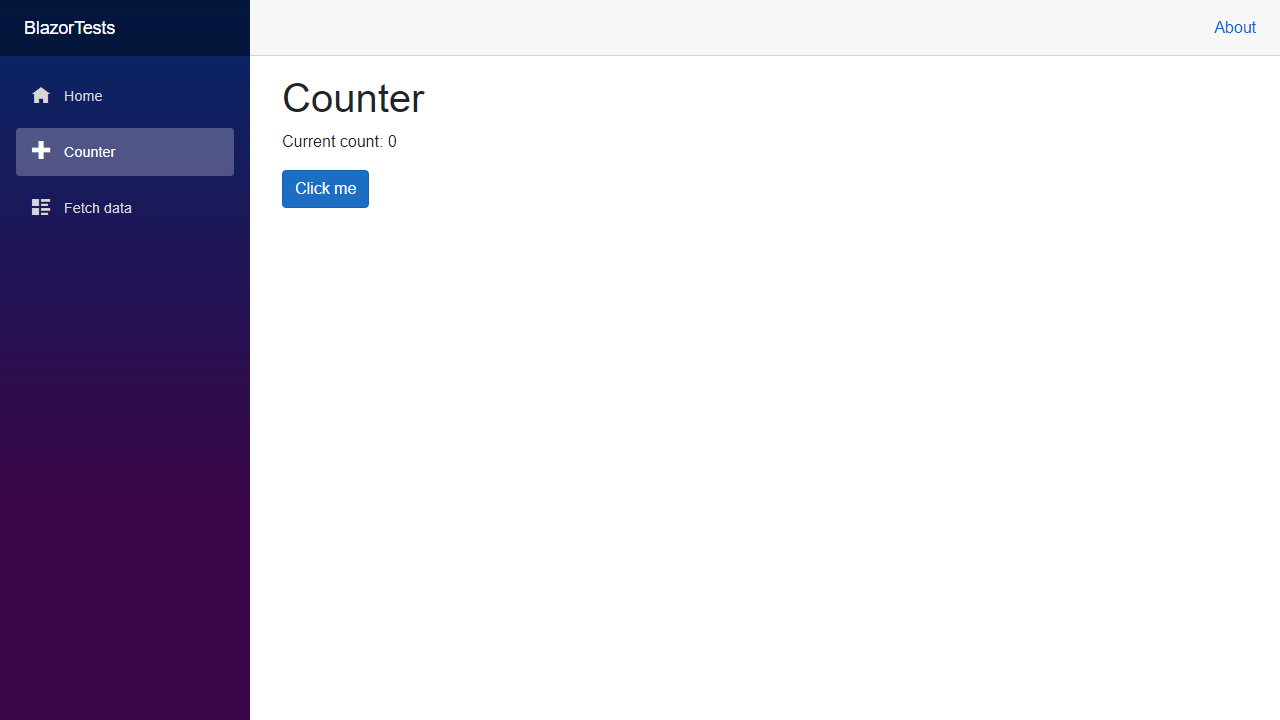 |
 |
That's it. That was our first small test. Pretty straightforward.
Structure of the E2E test
It is common to have folder for pages. Each page in this folder really represent one page which is functionality in your app. Furthermore your page consists out of multiple reusable component like buttons, input fields, ... These we will also put into another folder. At the end our test code itself will consist only out of a few lines of code. But those few lines are super readable and maintainable. More to that in a later part of the series.
Conclusion and what comes next
We saw how to setup a basic project for Playwright and have our first test to click a button twice. For more information look into the document of plawright. In the next part we will look how we can structure our tests better.
Resources:
Git-Repository of the series: BlazorTests