Unit and End-To-End Testing in Blazor
This blog post will give some light how to unit test components in Blazor. Furthermore we will build a small end to end test. On top I will give some good practices and hints what and what not to unit test. Now let's go and create a new Blazor project. I'll use JetBrains Rider but of course this tutorial will also work with Visual Studio or Visual Studio Code.
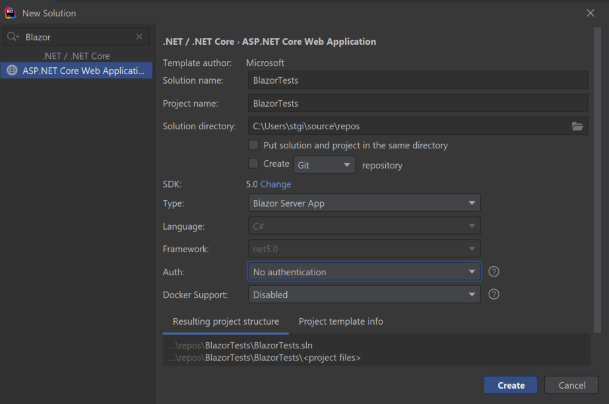
Create a new Blazor App
The first step is to create a new Blazor app. We will use the default template which is shipped with dotnet. So if you ever worked with Blazor this should look very familiar.
The default template will bring two components with it. First the Counter and the FetchData. This are nice candidates for a small unit test. But before we setup everything and write our first unit test, we should answer the question what are the differences between those two approaches and when to use what?
Unit test vs end to end test
The simplest answer what is the difference between these two is just there level where we test. Unit tests are (spoiler alert) for testing a unit of work. So we are on a very atomic level. In terms of blazor we are at best at the level of one single component and only the component itself. Furthermore every external dependency (that stuff which we get via the @inject attribute) like IJSInterop, IMyRepository or any other service gets mocked away. We are not using any real implementation.
Now it should be clear what end to end tests are. The complete opposite. We are looking from the process as whole. All services, I/O, data, network stuff is real. We don't know anything anymore from Blazor components. For more information look here
Comparison
| Capability | Unit Test | End To End Test |
|---|---|---|
| Scope | Blazor Component | The whole app |
| Execution Time | Milliseconds | Seconds |
| Sensitive to environment | No | Yes |
| Reliability | More | Less |
| Access to the component instance | Yes | No |
Now you should have a feeling why we call it testing pyramid. As end-to-end tests are more fragile and more expensive to maintain they should not used instead of unit tests. They are a nice addition. Well used for smoke tests.
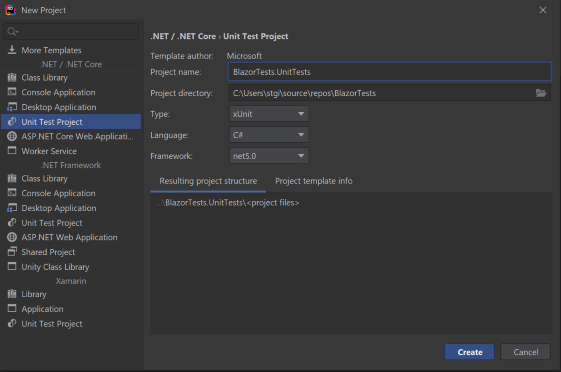
Create a new test project for the unit tests
Setup
Now we create a new unit test project. I'll use xUnit as my testing framework, feel free to work with whatever suits you best. I like the approach of xUnit that every test runs independently. There is no Setup or Teardown like nUnit. In my opinion this decoupling forces you to write cleaner tests. But this is personal preference. If you use for example MSTest then drop the [Fact] for [Test] (plus you have to decorate your class with [TestClass])
Now we have to install the NuGet package which enables us to write nice component unit tests. Here we take bUnit. Be sure that you checked Prelease so that also beta versions are displayed. Use on of the following methods to install the package:
- Via the nuget cli:
Install-Package bunit -Version 1.2.36-preview - Via dotnet cli:
dotnet add package bunit --version 1.2.36-preview - Or just install it via NuGet Ui like this:

I prefer the bUnit package is it is a meta package and automatically includes the core and web package.
After that you have to reference our productive project in the test project (like in every other unit test assembly).
Our first unit test
Now we are good to go! So let's start with our first unit test. I earlier wrote that the template will bring two components already included. So let's write an unit test for the counter. The counter will increase a label once the user clicked on a button. That seems pretty atomic. So let's test that.
Here the code from the Counter.razor
@page "/counter"

<h1>Counter</h1>

<p>Current count: @currentCount</p>

<button class="btn btn-primary" @onclick="IncrementCount">Click me</button>

@code {
    private int currentCount = 0;

    private void IncrementCount()
    {
        currentCount++;
    }

}
Now we can create a new test class where we will put in our test logic. I normally name my test classes like the component plus tests. So in this case CounterTests. But also here: personal preference, nothing mandatory.
Here the whole test. We will go through it afterwards:
using BlazorTests.Pages;
using Bunit;
using Xunit;

namespace BlazorTests.UnitTests
{
    public class CounterTests
    {
        [Fact]
        public void ShouldIncrementOnClick()
        {
            // Arrange
            using var context = new TestContext();
            var cut = context.RenderComponent<Counter>();

            // Act
            cut.Find("button").Click();

            // Assert
            cut.Find("p").MarkupMatches("<p>Current count: 1</p>");
        }
    }
}
So let's unwrap that a bit.
I guess the usings are straightforward. We need the references to our code we want to test. We need Xunit as our testing-framework and Bunit for the blazor components.
The beginning of the test we see the following: using var context = new TestContext();. This function comes from bUnit and allows us later to do all kinds of interactions with the Blazor component. The main task of this context is to create our component under test aka cut. This happens in the next line: var cut = context.RenderComponent<Counter>();.
The RenderComponent takes any ComponentBase (which every Blazor component is by default) and renders it. Now the magic happens: bUnit gives us the possibility to get real elements from our component. This is done via Find. Find wants to have a css selector. So you can use #myid for id's or .myClass for selecting objects which have exactly this class.
In this example we just use button. So Find will return the first occurrence of a button. As our component has only one button, we are good.
The Click() function does what it says. It clicks on the Html-Element. And if we look back to how the Counter-Component is constructed, this will trigger the IncrementCount function in the productive code.
Last we will look for a p-element and assert it matches an exact markup. We use the same Find method to retrieve the object in the first place.
If you are not really fan of this approach you can use the following which works equally
Assert.Equal("Current count: 1", cut.Find("p").TextContent);
The TextContent in this case gets basically the InnerHtml of the p-element which is the text itself.
Fetch Data
Now that we have a small introduction let's go further and check the FetchData service. The first thing we notice is that the component gets the Service injected via the DI-Container. We get directly an instance instead of an interface. Not my favorite approach. Also I think we can split this component into the layout stuff and the stuff which actually does something. This also enables me to show you two things in one test. Furthermore we want to have an unit test and not an integration test.
So let's start with the interface. We extract an interface from the WeatherService. The WeatherService.cs will look the following then:
namespace BlazorTests.Data
{
    public interface IWeatherForecastService
    {
        Task<WeatherForecast[]> GetForecastAsync(DateTime startDate);
    }

    public class WeatherForecastService : IWeatherForecastService
    {
        private static readonly string[] Summaries = new[]
        {
            "Freezing", "Bracing", "Chilly", "Cool", "Mild", "Warm", "Balmy", "Hot", "Sweltering", "Scorching"
        };

        public Task<WeatherForecast[]> GetForecastAsync(DateTime startDate)
        {
            // ... the rest
Now we have to register this in the DI-Container. So go to your Starup.cs and change how the WeatherService is registered. It should look now like this.
public void ConfigureServices(IServiceCollection services)
{
    services.AddRazorPages();
    services.AddServerSideBlazor();
    services.AddSingleton<IWeatherForecastService>(_ => new WeatherForecastService());
}
Now we create a component which takes the WeatherData and renders it. I'll put it in Shared with the name WeatherInformation:
@using BlazorTests.Data
<tr>
    <td>@Forecast.Date.ToShortDateString()</td>
    <td>@Forecast.TemperatureC</td>
    <td>@Forecast.TemperatureF</td>
    <td>@Forecast.Summary</td>
</tr>

@code {
    [Parameter]
    public WeatherForecast Forecast { get; set; }
}
Almost done. Now we need to use the interface and the new component. If done your class looks like this:
@page "/fetchdata"

@using BlazorTests.Data
@* We changed it here to the interface *@
@inject IWeatherForecastService ForecastService

<h1>Weather forecast</h1>

<p>This component demonstrates fetching data from a service.</p>

@if (forecasts == null)
{
    <p>
        <em>Loading...</em>
    </p>
}
else
{
    <table class="table">
        <thead>
        <tr>
            <th>Date</th>
            <th>Temp. (C)</th>
            <th>Temp. (F)</th>
            <th>Summary</th>
        </tr>
        </thead>
        <tbody>
        @foreach (var forecast in forecasts)
        {
            @* And we are using the component here *@
            <WeatherInformation Forecast="@forecast"></WeatherInformation>
        }
        </tbody>
    </table>
}

@code {
    private WeatherForecast[] forecasts;

    protected override async Task OnInitializedAsync()
    {
        forecasts = await ForecastService.GetForecastAsync(DateTime.Now);
    }

}
A lot of stuff but now we can right easy and maintainable tests. So lets create a new test class FetchDataTests.
using BlazorTests.Data;
using BlazorTests.Pages;
using BlazorTests.Shared;
using Bunit;
using Microsoft.Extensions.DependencyInjection;
using Xunit;

namespace BlazorTests.UnitTests
{
    public class FetchDataTests
    {
        [Fact]
        public void ShouldRenderData()
        {
            using var context = new TestContext();
            context.Services.AddSingleton<IWeatherForecastService>(_ => new WeatherForecastService());

            var cut = context.RenderComponent<FetchData>();

            var weatherInformationComponents = cut.FindComponents<WeatherInformation>();
            Assert.Equal(5, weatherInformationComponents.Count);
        }
    }
}
Okay let's unpack again. We again create a context. But this time we also add a singleton service much like our Startup. So we can control in our test what get's injected and how it behaves. For the sake of it I used the normal implementation. You wouldn't do that in a normal unit test. Here we would use a Mock and just mock the behaviour of the service. This is more for demonstration purposes.
A bit further down we do the following: var weatherInformationComponents = cut.FindComponents<WeatherInformation>();. Instead of looking for an HTML element we look for another blazor component and check their existence.
Input fields and parameters
Let's assume you have the following component named PowerOf:
<h3>Get power of @Pow</h3>
<input type="number" @bind="_base" />

<button @onclick="ComputePow"></button>

<p>@_result</p>

@code {
    [Parameter]
    public int Pow { get; set; }

    private int _base;

    private int _result;

    private void ComputePow()
    {
        _result = (int) Math.Pow(_base, Pow);
    }
}
The component itself just receives the exponent and on button click calculates _base^Pow. Not the most beautiful thing. But we have two things we did not have before: Parameters and an InputElement. So let's create a new test:
using BlazorTests.Pages;
using Bunit;
using Xunit;

namespace BlazorTests.UnitTests
{
    public class PowerToTests
    {
        [Fact]
        public void ShouldCalculatePowerOfEnteredBase()
        {
            using var context = new TestContext();
            var cut = context.RenderComponent<PowerOf>(
                parameterBuilder => parameterBuilder.Add(selector => selector.Pow, 2));
            cut.Find("input").Change("3");

            cut.Find("button").Click();

            Assert.Equal("9", cut.Find("p").TextContent);
        }
    }
}
We can see that RenderComponent has an overload which allows us to specify the value of a parameter. Small hint: You can also setup any event your component offers for the caller.
Here we set the Value to 2. Directly in the next line we can see how to set values for an HTML element. In this case we set the only input element in this component to the string "3".
As the value is bound to this input field, everything will be calculated when we click the button.
Closing
I hope I could you a good sense how to write unit tests and even refactor some of your components to make them more unit test friendly. For more detailed test scenarios look on the official website.
Part 2
If you want to go directly to Part to click here