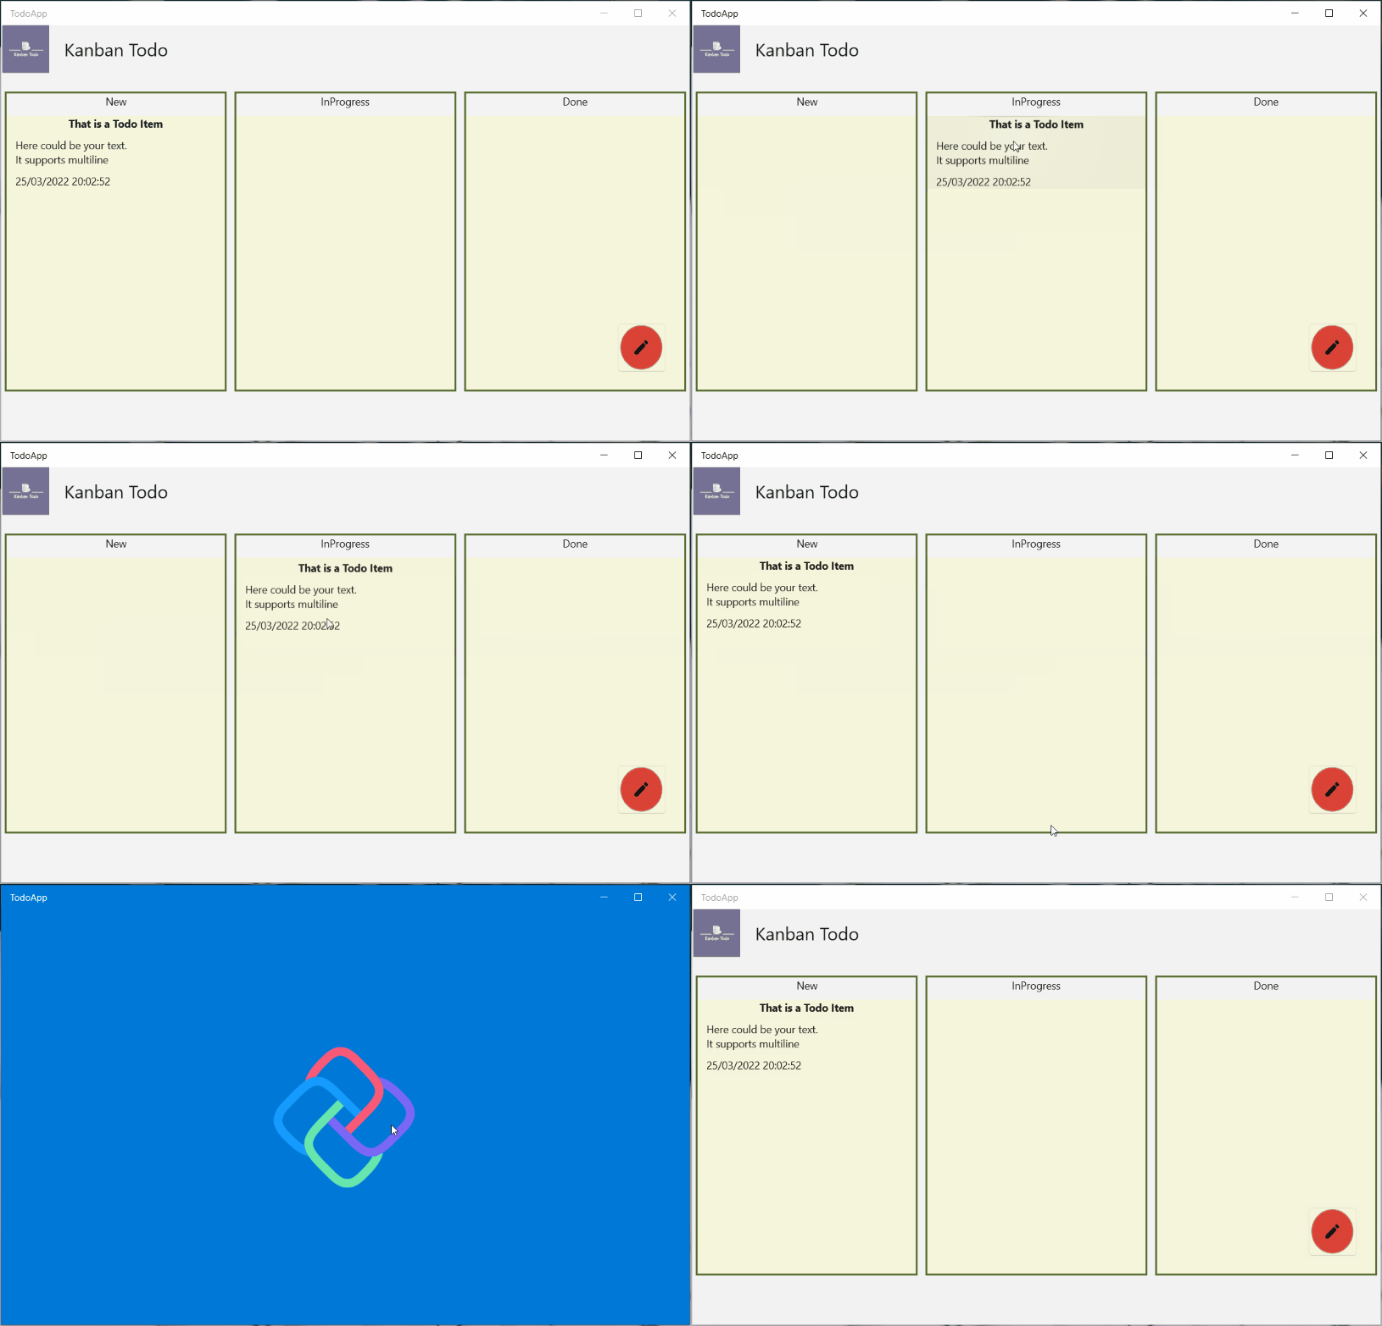
This is the last part of our series to wrap all things up. We will implement the drag and drop behavior plus we will preserve and load the state so that we can continue where we left. As always here the result first and then we go through the single steps:

Drag and Drop
The good part first our Swimlane or more in detail our ListView has everything we need to make drag and drop possible.
So lets extend the ListView with the necessary properties with the following properties:
Swimlane.xaml.cs
<ListView x:Name="itemListView"
                  AllowDrop="True"
                  CanDragItems="True"
AllowDrop- We allow elements to get dropped on ourListViewCanDragItems- We allow the user to drag ourListViewItemsaround. In our case theTodoitems
Without those two properties we can implement what we want and will never succeed. So the requirements are done: Check! The next part will be handling the events itself. We have to provide 4 of them. I will go through them in detail:
DragOver="SetDragOverIcon"
DragItemsStarting="SetDragItem"
Drop="DropItem"
DragItemsCompleted="UpdateList"
DragOver
The simplest one at the beginning. We will leveragethe DragOver event to set the icon when we move the icon from one lane to another:
private void SetDragOverIcon(object sender, DragEventArgs e)
{
    e.AcceptedOperation = DataPackageOperation.Move;
}
We use the Move icon. I guess this does not need further explanation.
DragItemsStarting
This event is used to indicate that an item of our ListView started to get dragged around. We will use this event to set the information about the dragged item. The idea behind the following code is, that we save the Id of the Todo item which we drag around. Remember: All Swimlanes know in theory all Todo-items. We can leverage that. Oh yes we use the Id because it is the easiest way. You will see in the second. And if you ask yourself Id? Which Id? Yes we will add an Id to our Todo domain object:
public class Todo
{
    public Guid Id { get; set; } = Guid.NewGuid();

    public string Title { get; set; }
Now that we got this now let us write the code for the DragItemsStarting event:
private void SetDragItem(object sender, DragItemsStartingEventArgs e)
{
    // We only have one item we can drag around (in theory we can also allow multi-select)
    var draggedItem = e.Items.First() as Todo;

    // We set the id of the current dragged item
    e.Data.SetText(draggedItem.Id.ToString());
}
Drop
As discussed earlier: The Swimlane has access to all the items. Therefore we get the item with the Id and set our State to its State.
Remember how we introduced AdvancedCollectionView in the last part? We have to refresh the view to update the filter. To do so, please refactor the AdvancedCollectionView into a new field. It should look like that:
private AdvancedCollectionView view;

private void SetFilter(FrameworkElement sender, DataContextChangedEventArgs args)
{
    view = new AdvancedCollectionView(((MainPageViewModel)this.DataContext).TodoItems, true);
    view.Filter = item => ((Todo)item).KanbanState == State;
    itemListView.ItemsSource = view;
}
The cool thing about the DragEventArgs is that these hold the data we set in the DragItemsStarting. So we will get the Id we saved before and look for the Todo item with exactly that Id. If we start from the State New and move it to InProgress it will be the InProgress Swimlane which receives the Drop event.
private async void DropItem(object sender, DragEventArgs e)
{
    var todoId = Guid.Parse(await e.DataView.GetTextAsync());
    var todo = ((MainPageViewModel)DataContext).TodoItems.Single(t => t.Id == todoId);
    todo.KanbanState = State;
    view.Refresh();
}
The view.Refresh will lead to update the list. Now only one little detail is missing: We have to update the original list.
DragItemsCompleted
As said earlier when we move an item from New to InProgress the InProgress Swimlane will receive the Drop event when we "drop" the item. But also the New Swimlane will receive an event: DragItemsCompleted. We use it to update the original filter:
private void UpdateList(object sender, DragItemsCompletedEventArgs e)
{
    view.Refresh();
}
Puh we are done! Hit F5 and execute the project! Create and item and try to drag and drop it from one lane to another... And? It does not work!
StackPanel
The problem here is the StackPanel. Let's demonstrate something. Just add a BackgroundBrush to the ListView like that:
<ListView x:Name="itemListView" Background="Beige"
            AllowDrop="True"
The problem is that our ListView is only as big as our ListViewItems. But that means that when we have an empty list, there is no "space" to drop an item. We can easily fix that. Just use a Grid instead of our StackPanel:
<Grid MinWidth="200" MinHeight="400" BorderBrush="DarkOliveGreen" BorderThickness="2">
    <Grid.RowDefinitions>
        <RowDefinition Height="Auto" />
        <RowDefinition Height="10" />
        <RowDefinition Height="*" />
    </Grid.RowDefinitions>

    <TextBlock Text="{x:Bind State}" HorizontalAlignment="Center" Grid.Row="0"></TextBlock>
    <ListView x:Name="itemListView" Background="Beige" Grid.Row="2"
                AllowDrop="True"
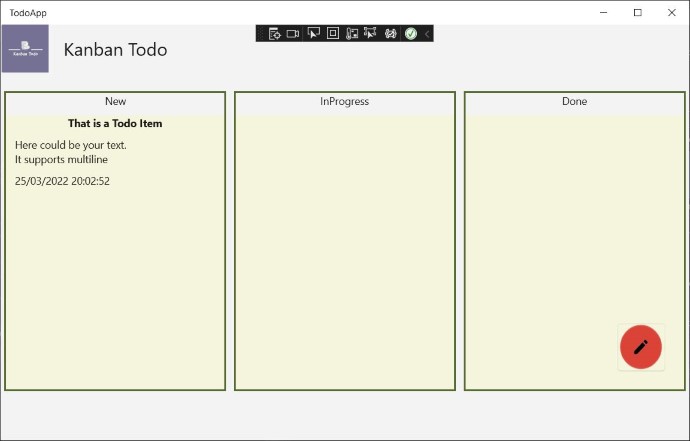
With Height="*" we let the ListView fill the available space completely. Here it how it looks like:

And if you try it now, everything works as it should. Hurrrayyy! ???????
There is only one thing left we have to do: We have to take care of our state handling!
Preserve and load the state
Now here is the cool thing, we only write the logic to save the state once and it works everywhere! Doesn't matter if android or web. We can just easily save the state.
We will basically json serialize our list to preserve the state and deserialize when we load into our application. For that we install Newtonsoft.Json nuget package. You can add this to all the productive projects.
Loaded- This event will be raised once thePageis available. Here we want to load the state, if it is available.LostFocuswill be raised every time we click away for example or some pop up appears on thePagelike ourAddTodoItemDialog. But most important, it will be raised when we close our app!
public MainPage()
{
    InitializeComponent();
    DataContext = new MainPageViewModel();
    addItemButton.TodoItemCreated += (o, item) => ((MainPageViewModel)DataContext).TodoItems.Add(item);

    Loaded += RecoverState;
    LostFocus += (s, e) => SaveState();
}

private async void SaveState()
{
    var folder = ApplicationData.Current.LocalFolder; // Get the local folder (on WASM IndexedDb is used)
    var file = await folder.CreateFileAsync("todoapp.json", CreationCollisionOption.OpenIfExists); // Create the file or open it
    await FileIO.WriteTextAsync(file, JsonConvert.SerializeObject(DataContext)); // Serialize our ViewModel and save it to file
}

private async void RecoverState(object sender, RoutedEventArgs e)
{
    var folder = ApplicationData.Current.LocalFolder;
    var file = await folder.TryGetItemAsync("todoapp.json"); // Try to grab the file if it exists
    if (file != null)
    {
        // Read the content of the file and deserialize into our MainPageViewModel object
        var text = await FileIO.ReadTextAsync(file as IStorageFile);
        var viewmodel = JsonConvert.DeserializeObject<MainPageViewModel>(text);
        if (viewmodel?.TodoItems.Any() == true)
        {
            // if we have any data just set the DataContext to it
            DataContext = viewmodel;
        }
    }
}
Super straightforward! We did it! We built a small todo app. Sure it could be sexier, but that part can be done later. For now it is important that we have a todo app which can be used on many platform with the same source code base. That is plain awesome.
Summary
Now what did I learn over the last 5 episodes of the series. What is my experience with the Uno Platform in general?
I initially thought having that Shared project might be tricky to work with, but in fact it wasn't so horrible after all. Sure there is still the issue to install a nuget package to all Heads but even that is "gone" with the new .net6 templates. In the series I used the "normal" template where the UWP head is still running .net core 3.1 instead of .net6. That means we can't use the Directory.Build.Props trick, but they are working on it.
A smaller thing was sometimes the error messages are confusing. That might mainly be because I didn't work much with Xamarin and WPF lately. Anyway if you have an issue in the xaml code file you get a lot of errors in the output and you really have to look what is going on. More often when I had a malformed xaml file I get >20 errors and one of them is something like that: CS0103 The name 'InitializeComponent' does not exist in the current context.
What I really enjoyed is the documentation of the Uno Platform. There are lots of samples you can utilize. Especially as a beginner this is really important because the learning curve is quite steep at the beginning. And also most of the UWP or WinUI Stackoverflow questions and answers hold true for the Uno Platform, which makes sense as they go into the same direction. I also was very fascinated the first time I just started multiple platforms and it worked in the same way.
All in all if you are used to WPF and or work with XAML you feel at home. I hope you could also tkae a something with you from that small mini series. I appreciated very much.
